To get started, navigate to Phonebook from the left side of the dashboard and select Create new group. You can then name the new group appropriately. There are three different options for adding new contacts to the group. 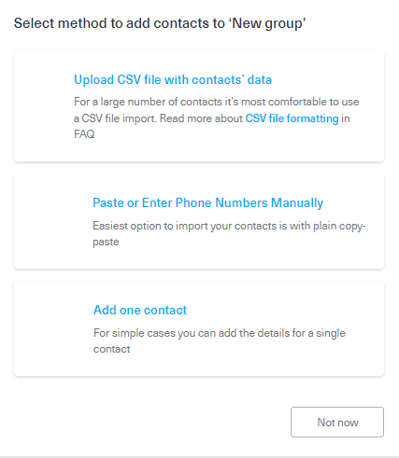
1. Upload CSV file with contacts' data
This is a good option if you have a large database of numbers. Adding numbers manually one by one would take up a lot of time, so importing all contacts from a CSV file can save you from the hustle.
First of all, your spreadsheet columns must have headers that are supported by Messente Phonebook. The supported headers are:Title, First Name, Last Name, Phone, Email, Company, Custom, Custom2, Custom3, Custom4, Blacklisted.
Column Phone is the minimal information required to import your contacts. Phone numbers in your Phonebook must include a country prefix. We have added a functionality to the import form so that you can add the default country prefix automatically. You can read more about this functionality down below.
If you cannot create this file using proper software you can create it on your own but you have to remember to separate each field by a comma "," and quotation marks (") for each row.
NB! The file must be encoded in the UTF-8 charset.
After the import is completed you will see how many contacts were added and how many skipped. Common reasons for skipped rows are:
- Duplicate numbers in CSV file
- The number already existed in this group
- Empty lines in CSV file
2. Paste or enter phone numbers manually
This option will let you enter only the phone numbers. Numbers can be separated by commas or line breaks. Since all numbers need to include the country prefix, we have added a functionality to the import form so that you can add the default country prefix automatically. You can read more about this functionality down below.
After the numbers are imported to your Phonebook, you have the option to edit the contacts and add additional information.
After the import is completed you will see how many contacts were added and how many skipped. Common reasons for skipped rows are:
- Duplicate numbers in CSV file
- Number already existed in this group
3. Add one contact
This option will let you add a single contact manually.
The bare minimum information that is needed to add a contact is the phone number. All numbers must include a country prefix, for example, +372 for Estonia, +44 for the United Kingdom, etc.
After filling in the number field, add optional information about the contact to the fields below, and click Add Contact.
- If our system is unable to detect the country prefix, you will see an error "Invalid number - did you forget prefix?"
- After adding the contact, you will see from the Phonebook group details view what country this number belongs to.
How to add the country prefix automatically with the import?
Phone numbers must comply with e.164 format.
The first two import options (Upload CSV file with contacts' data and Paste or enter phone numbers manually) have the functionality of automatically adding the country prefix to numbers.
The country prefix is added to all numbers identically i.e. "+372 XXXXXXX".
Country prefixes are added to phone numbers automatically if
- '+' sign is missing from the phone number
- the imported phone number doesn't start with the same prefix
| Number before import | Number after the import is processed |
|---|---|
| 55566677 | +37255566677 |
| 37255566677 | +37255566677 |
| 371298554355 | +372371298554355 ** (warning) |
| +37002984685 | +37002984685 (no change) |
What information can be added about a contact?
In addition to having all your numbers in a Phonebook, you can include additional information about contacts. This is helpful to keeping everything organized and easily understandable, as well as being able to customize your SMS campaigns using Tags and Templates.
There are five sets of data points (First name, Last name, Email, Title, Company) and four Custom fields, which can be used for any other data.
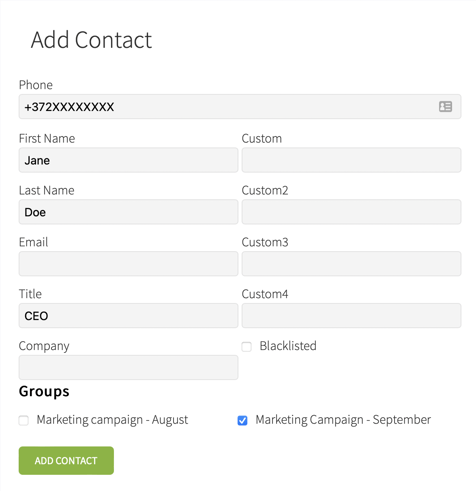
Underneath contact information, you will see all groups that this number belongs to and can modify this easily.
The contact information also includes a Blacklisted box. When a contact is blacklisted, we won't send out messages to this number. This functionality can be used, when a contact has chosen to opt-out from receiving SMS messages.
How to send the campaign to the phonebook group?
All you have to do is to head to Messaging, select the phonebook group as the recipient from the To field, select the wished sender name and fill out the content. Nothing else left to do than to click on preview and send!